SignalR 簡介
如果你是第一次接觸 SignalR,可以想像它是一個幫你處理即時通訊的工具。它會自動幫你搞定誰在線上、誰下線了,還能讓你輕鬆把訊息送給所有人或指定的人,而且可以應付很多人同時使用。簡單來說,不用煩惱那些複雜的底層細節,SignalR 幫你包好了!
傳輸協議
你可能會想問,SignalR 到底怎麼做到讓訊息這麼即時的呢?其實它會自動幫你選擇最適合的傳輸方式:
- WebSocket:就像一直開著的專線,速度最快,也是首選。
- Server-Sent Events (SSE):伺服器主動推消息給你,像訂閱新聞一樣。
- Long Polling:不斷問伺服器「有新消息嗎?」來達成即時效果。
不用擔心怎麼挑,SignalR 會幫你搞定!
實作步驟
1. 建立專案並添加 SignalR
在 .NET Core/.NET 5+ 中,SignalR 已經被整合到 ASP.NET Core 框架中了,所以我們不需要額外安裝 SignalR 的服務器端套件,只需要在 Program.cs 中配置 SignalR:
 1
 2
 3
 4
 5
 6
 7
 8
 9
10
11
12
13
14
15
16
17
18
19
| using WebApiDemo.Hubs;
var builder = WebApplication.CreateBuilder(args);
// 添加 SignalR 服務到 DI 容器
builder.Services.AddSignalR();
var app = builder.Build();
app.UseStaticFiles();
app.UseRouting(); // 啟用路由
// 配置 SignalR Hub 路由
app.MapHub<ChatHub>("/chatHub");
// 設置默認頁面
app.MapGet("/", () => Results.File("wwwroot/index.html", "text/html"));
app.Run();
|
2. 創建 Hub
Hub 是 SignalR 的核心角色,可以想成「訊息小幫手」,負責在用戶的瀏覽器和伺服器之間傳遞訊息。基本的 Hub 需要做的事很簡單:收到使用者的訊息並轉送給其他人,處理使用者連線和斷線的通知。
 1
 2
 3
 4
 5
 6
 7
 8
 9
10
11
12
13
14
15
16
17
18
19
20
21
22
23
24
25
26
| using Microsoft.AspNetCore.SignalR;
namespace WebApiDemo.Hubs;
public class ChatHub : Hub
{
// 這個方法用來接收使用者的訊息並廣播給所有人
public async Task SendMessage(string user, string message)
{
await Clients.All.SendAsync("ReceiveMessage", user, message);
}
// 使用者連線時會觸發這裡,把新加入的使用者通知給大家
public override async Task OnConnectedAsync()
{
await Clients.All.SendAsync("UserConnected", Context.ConnectionId);
await base.OnConnectedAsync();
}
// 使用者斷線時會執行這裡,把誰離開的通知發給所有人
public override async Task OnDisconnectedAsync(Exception? exception)
{
await Clients.All.SendAsync("UserDisconnected", Context.ConnectionId);
await base.OnDisconnectedAsync(exception);
}
}
|
Hub 重要屬性
Clients:負責把訊息發送給誰,例如:
Clients.All:送給所有人,不管是誰Clients.Caller:只回傳給發送訊息的人Clients.Others:送給除了發訊息的人以外的所有人
Context:提供關於這次連線的資訊,例如:
Context.ConnectionId:每個使用者連上來後都有一個獨一無二的編號Context.User:使用者的身份資訊,適用在需要登入或認證的應用程式
3. 客戶端實現
在 root 目錄底下建立 wwwroot 的資料夾,並且建立 index.html 輸入以下內容:
 1
 2
 3
 4
 5
 6
 7
 8
 9
10
11
12
13
14
15
16
17
18
19
20
21
22
23
24
25
26
27
28
29
30
31
32
33
34
35
36
37
38
39
40
41
42
43
44
45
46
47
48
49
50
51
52
53
54
55
56
57
58
59
60
61
62
63
64
65
66
67
68
69
70
71
72
73
74
75
76
77
78
79
80
81
82
83
84
| <!DOCTYPE html>
<html>
<head>
<meta charset="UTF-8">
<title>SignalR 聊天室</title>
<style>
#messagesList { border: 1px solid #ccc; height: 300px; overflow-y: auto; padding: 10px; margin-bottom: 10px; }
.form-group { margin: 10px 0; }
.form-group label { display: inline-block; width: 70px; }
.form-group input { padding: 5px; width: 200px; }
#sendButton { padding: 5px 15px; margin-top: 10px; }
</style>
</head>
<body>
<div class="container">
<h2>SignalR 聊天室</h2>
<div id="messagesList"></div>
<div class="form-group">
<label for="userInput">用戶名:</label>
<input type="text" id="userInput" />
</div>
<div class="form-group">
<label for="messageInput">消息:</label>
<input type="text" id="messageInput" />
</div>
<button id="sendButton">發送</button>
</div>
<script src="https://cdnjs.cloudflare.com/ajax/libs/microsoft-signalr/8.0.0/signalr.min.js"></script>
<script>
// 建立連接
const connection = new signalR.HubConnectionBuilder()
.withUrl("/chatHub") // Hub 的路由
.build();
document.getElementById("sendButton").disabled = true;
// 註冊接收消息的處理函數
connection.on("ReceiveMessage", function (user, message) {
const msg = `${user}: ${message}`;
const li = document.createElement("div");
li.textContent = msg;
document.getElementById("messagesList").appendChild(li);
});
// 處理用戶連接事件
connection.on("UserConnected", function (connectionId) {
const msg = `用戶已連接 (${connectionId})`;
const li = document.createElement("div");
li.textContent = msg;
li.style.color = "green";
document.getElementById("messagesList").appendChild(li);
});
connection.on("UserDisconnected", function (connectionId) {
const msg = `用戶已斷開連接 (${connectionId})`;
const li = document.createElement("div");
li.textContent = msg;
li.style.color = "red";
document.getElementById("messagesList").appendChild(li);
});
// 啟動連接
connection.start().then(function () {
document.getElementById("sendButton").disabled = false;
}).catch(function (err) {
return console.error(err.toString());
});
// 發送消息
document.getElementById("sendButton").addEventListener("click", function (event) {
const user = document.getElementById("userInput").value;
const message = document.getElementById("messageInput").value;
// 調用服務器端的 SendMessage 方法
connection.invoke("SendMessage", user, message).catch(function (err) {
return console.error(err.toString());
});
document.getElementById("messageInput").value = "";
event.preventDefault();
});
</script>
</body>
</html>
|
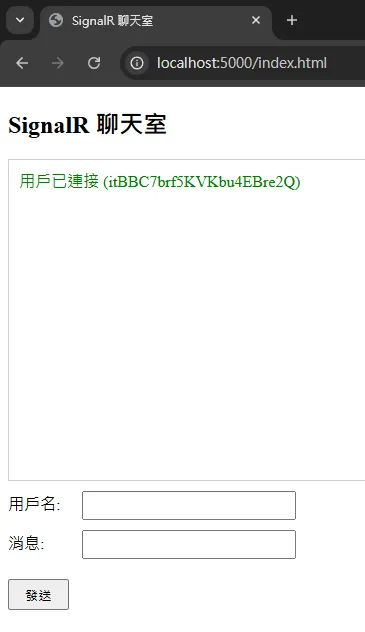
這時候運行你的專案(記得設定 launchSettings.json),輸入 localhost:5000/index.html,就可以看到以下的畫面。
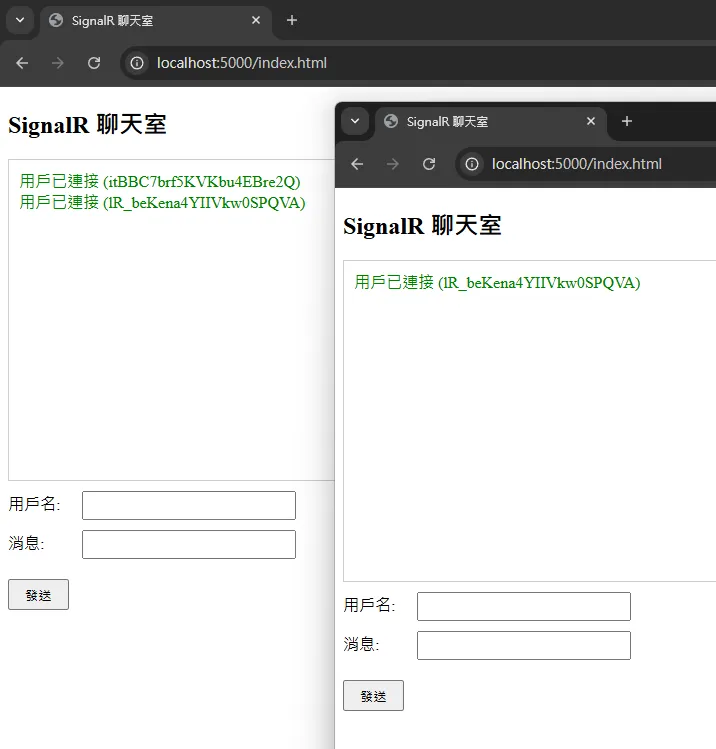
如果你再多開一個新的 tab,就會看到第一個 tab 多了一行連接的用戶:
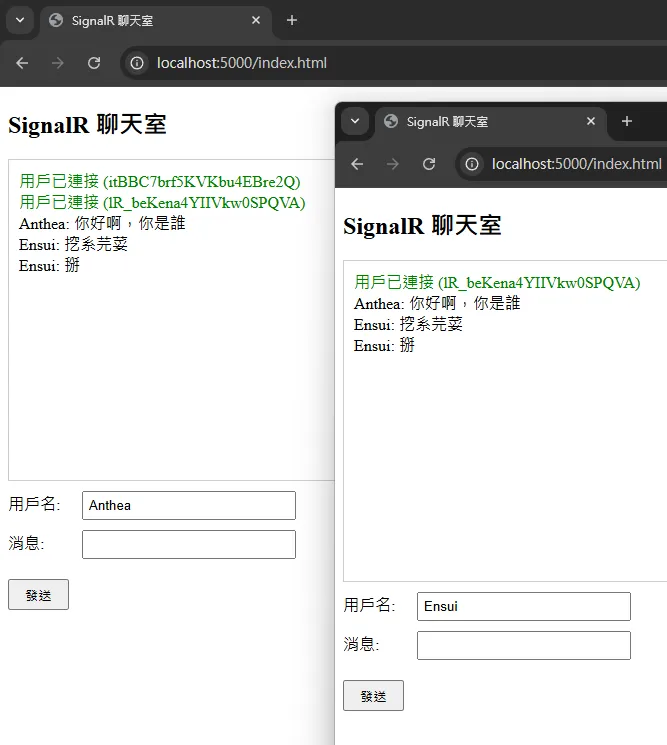
兩個不同的人可以輸入訊息,按下發送後,另外一邊也會收到:
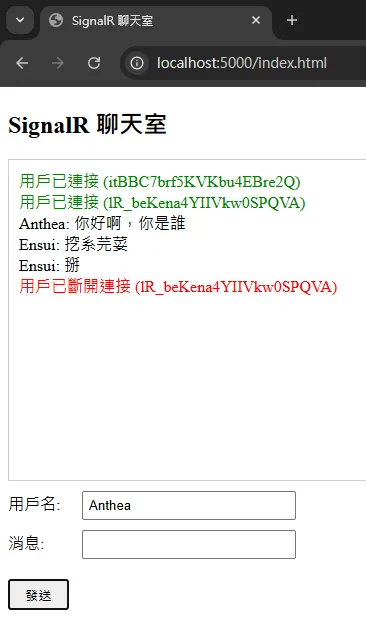
有人離開的話就可以送出通知: