在工作上,基本都需要針對儲存的資料進行分類,而在地理資訊的領域上,最常使用的一種分類方式就是地籍,又可以細分為縣市、鄉鎮市區、地段等資訊。針對這些分類的名稱,特別是地段的層級,通常都會有幾十筆資料,如果單純使用下拉式選單,就會把時間浪費在茫茫字海裡面進行搜尋。
如果使用的前端有搭配 Bootstrap 框架,通常會查詢到 bootstrap-select 這個好用的套件 😆 接下來就讓我們看一下搭配簡單的 API ,要怎麼把 bootstrap-select 和 Vue 一起使用吧。
準備資料並建立 API
利用地籍圖資網路便民服務系統取得相關的縣市鄉鎮清單後,整理成 JSON 檔,再使用 API 的方式把資料傳送到前端。作為簡單的示範,我只有整理出台中市西屯區以及新北市三峽區底下的所有地段號。
 1
 2
 3
 4
 5
 6
 7
 8
 9
10
11
12
13
14
15
16
17
18
19
20
21
22
23
24
25
26
27
28
29
30
31
| using Microsoft.AspNetCore.Mvc;
using Newtonsoft.Json;
namespace bootstrap_selected_sample.Controllers;
[ApiController]
[Route("api/[controller]")]
public class CodeController : ControllerBase
{
[HttpGet]
public IActionResult Counties()
{
var path = "files/county.json";
var json = ReadFromJson(path);
var info = JsonConvert.DeserializeObject<List<SimpleInfo>>(json);
return Ok(info);
}
private string ReadFromJson(string path)
{
var reader = new StreamReader(path);
var readToEnd = reader.ReadToEnd().Replace("\r", "").Replace("\n", "").Replace(" ", "");
return readToEnd;
}
}
public class SimpleInfo
{
public string Id { get; set; }
public string Name { get; set; }
}
|
載入套件
方便起見,下面的範例都會使用直接引入 CDN 的方式。另外要注意的是,在 bootstrap-select 官方網站上所提供的 CDN 版本是搭配 bootstrap 4.X,如果你是使用 bootstrap 5 的話,要記得到 bootstrap-select 的 GitHub 查看最新版本的 CDN 網址喔。以下是我使用到的套件和版本:
| Name | Version |
|---|
| Bootstrap | 5.0.2 (css + js) |
| bootstrap-select | 1.14.0-beta3 (css + js) |
| Vue.js | 3 |
| jQuery | 3.6.0 |
| axios | 無指定版本 |
使用 bootstrap-select
接下來就要開始使用 bootstrap-select 了。按照官方文件的寫法,最快的方法是直接在 select 中加入 selectpicker 的 class 屬性,或是使用 JavaScript 來進行初始化:
1
| $('#county-select').selectpicker();
|
大致上知道怎麼使用後,接著我們要加入 API 所回傳的資料,首先試試看最簡單的全台縣市清單吧!
 1
 2
 3
 4
 5
 6
 7
 8
 9
10
11
12
13
14
15
16
17
18
19
| <!-- sample.html -->
<div id="app" class="container my-5">
<div class="row">
<div class="col-12 mt-5 row">
<form>
<div class="row g-3 align-items-center">
<div class="col-auto">
<label for="county-select" class="col-form-label">縣市</label>
</div>
<div class="col-auto">
<select id="county-select" class="selectpicker">
<option v-for="c in code.county" :value="c.code">{{c.name}}</option>
</select>
</div>
</div>
</form>
</div>
</div>
</div>
|
 1
 2
 3
 4
 5
 6
 7
 8
 9
10
11
12
13
14
15
16
17
18
19
20
21
22
23
24
25
26
27
28
| // sample.js
const app = Vue.createApp({
data(){
return{
code:{
county: []
},
selected:{
county: null
}
}
},
methods:{
getCounties(){
axios({
method: 'get',
url: './api/code'
}).then(res => {
this.code.county = res.data;
$('#county-select').selectpicker();
})
},
},
mounted(){
this.getCounties();
}
});
app.mount('#app');
|
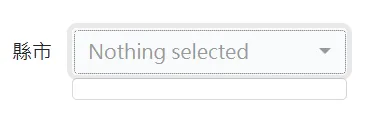
當你照著打上面的內容並且開啟網頁之後,你應該會看到你的下拉式選單裡面甚麼都沒有,並且也沒有任何的錯誤訊息。
我的清單去哪裡了
(以下皆為我的理解,如果有誤還請各位大大不吝指正。)
會造成這個結果,我的猜測是因為 Vue 的生命週期的緣故。被包在 Vue 掛載範圍內的 html 內容,會在 app.mount('#app') 執行之後,才正式的被放到 DOM 元件上,但在這之前,你的 $('#county-select').selectpicker(); 會先幫你把下拉式選單初始化,可是這個時候其實還沒有真正的把資料利用 v-for 放入下拉式選單的內容中,所以 bootstrap-select 認為這是一個空的選單,自然而然初始化的結果就會是空的了。
要解決這個問題,可以使用 Vue 中的一個 function nextTick()。他會在整個 DOM 都掛載完成之後,才去進行寫在 nextTick() 內的程式碼。原本的用意其實是在於非同步更新,節省效能。
使用 nextTick()
 1
 2
 3
 4
 5
 6
 7
 8
 9
10
11
12
13
14
15
16
17
18
19
20
21
22
23
24
25
26
27
28
29
30
31
32
33
34
35
| // sample.js
const app = Vue.createApp({
data(){
return{
code:{
county: []
},
selected:{
county: null
}
}
},
methods:{
getCounties(){
axios({
method: 'get',
url: './api/code'
}).then(res => {
this.code.county = res.data;
// 原本的程式碼
// $('#county-select').selectpicker();
// 使用 nextTick() 包起來
Vue.nextTick(() => {
$('#county-select').selectpicker();
})
})
},
},
mounted(){
this.getCounties();
}
});
app.mount('#app');
|
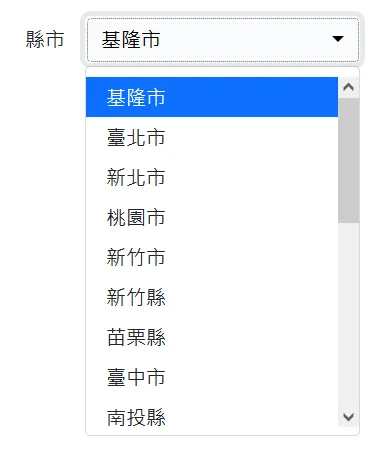
利用剛剛學到的 Vue.nextTick() 更新完程式碼之後,你應該就可以順利看到我們成功接回 API 的結果了:
以上就是基本的 bootstrap-select 使用方式。下一篇會接著介紹更進階的用法,包含如果我要動態的變更下拉式選單,例如:選擇台中市,就只會出現台中的鄉鎮市區選單,會遇到甚麼樣的問題和解法。
感謝你的收看!
參考文章