上一篇提到基本的下拉式選單應用之後,接下來要記錄的是多個選單彼此連動時的應用。
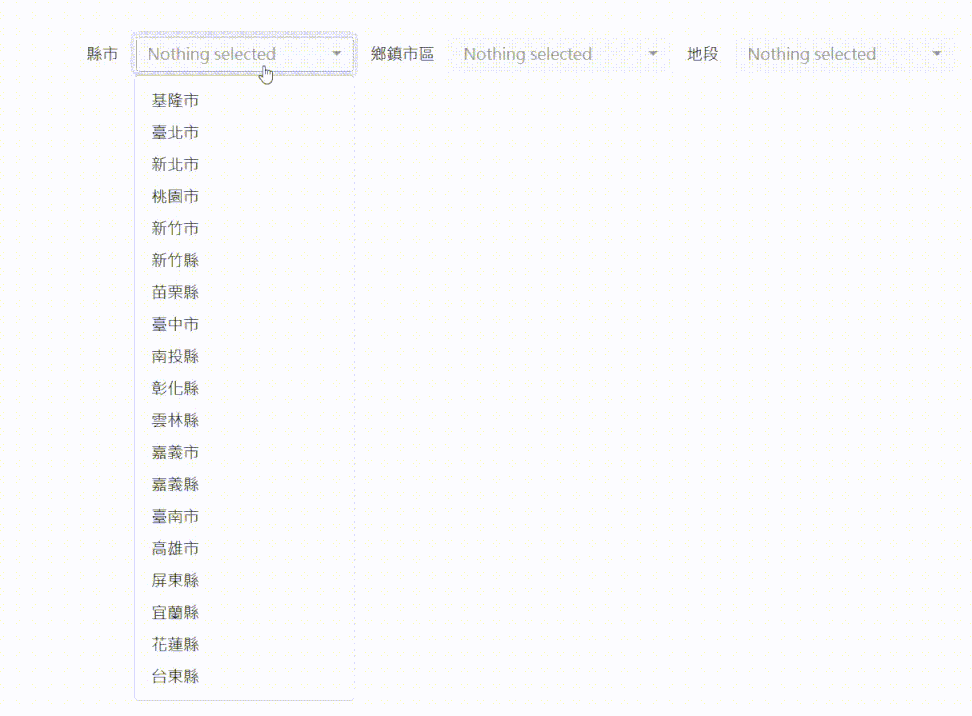
以前一篇工作上的例子來說,通常把資料用縣市、鄉鎮市區、地段這三種層級區分開來,所以當我選到台北市的時候,鄉鎮市區的選單裡就不應該會出現西屯區的項目,這個就是我所謂的連動 — — 當其中一個選項的值改變,就會讓其他的選單內容也跟著不同。
事前準備
簡單的 API
清單來源一樣是地籍圖資網路便民服務系統,我只整理了台中市的西屯區和西區這兩個行政區底下的段名作為範例。
 1
 2
 3
 4
 5
 6
 7
 8
 9
10
11
12
13
14
15
16
17
18
19
20
21
22
23
24
25
26
27
28
29
30
31
32
33
34
35
36
37
38
39
40
41
42
43
44
45
46
47
48
49
50
51
52
53
54
55
56
57
58
59
60
61
62
63
64
65
66
67
| using Microsoft.AspNetCore.Mvc;
using Newtonsoft.Json;
namespace bootstrap_selected_sample.Controllers;
[ApiController]
[Route("api/[controller]")]
public class CodeController : ControllerBase
{
[HttpGet]
public IActionResult Counties()
{
var path = "files/county.json";
var json = ReadFromJson(path);
var info = JsonConvert.DeserializeObject<List<SimpleInfo>>(json);
return Ok(info);
}
[HttpGet("{county}")]
public IActionResult Towns(string county)
{
var path = county.ToUpper() switch
{
"B" => "files/taichung.json"
};
var json = ReadFromJson(path);
var info = JsonConvert.DeserializeObject<List<SimpleInfo>>(json);
return Ok(info);
}
[HttpGet("{county}/{town}")]
public IActionResult Sections(string county, string town)
{
var path = "";
switch (county)
{
case "B" when town == "06":
path = "files/xitun.json";
break;
case "B" when town == "04":
path = "files/xi.json";
break;
}
var json = ReadFromJson(path);
var info = JsonConvert.DeserializeObject<List<ComplexInfo>>(json);
return Ok(info);
}
private string ReadFromJson(string path)
{
var reader = new StreamReader(path);
var readToEnd = reader.ReadToEnd().Replace("\r", "").Replace("\n", "").Replace(" ", "");
return readToEnd;
}
}
public class SimpleInfo
{
public string Id { get; set; }
public string Name { get; set; }
}
public class ComplexInfo : SimpleInfo
{
public string OfficeCode { get; set; }
}
|
套用 bootstrap-select
首先,我們依照上次的方法,使用 Vue.$nextTick() 來試試看效果怎麼樣。
 1
 2
 3
 4
 5
 6
 7
 8
 9
10
11
12
13
14
15
16
17
18
19
20
21
22
23
24
25
26
27
28
29
30
31
32
33
34
35
36
37
38
39
40
| <!-- sample.html -->
<div id="app" class="container my-5">
<div class="row">
<div class="col-12 mt-5 row">
<form>
<div class="row g-3 align-items-center">
<div class="col-auto">
<label for="county-select" class="col-form-label">縣市</label>
</div>
<div class="col-auto">
<select id="county-select" v-model="selected.county">
<option v-for="c in code.county" :value="c">{{c.name}}</option>
</select>
</div>
<div class="col-auto">
<label for="county-select" class="col-form-label">鄉鎮市區</label>
</div>
<div class="col-auto">
<select id="town-select" v-model="selected.town">
<option v-for="t in code.town" :value="t">{{t.name}}</option>
</select>
</div>
<div class="col-auto">
<label for="county-select" class="col-form-label">地段</label>
</div>
<div class="col-auto">
<select id="section-select" v-model="selected.section">
<option v-for="s in code.section" :value="s">{{s.name}}</option>
</select>
</div>
</div>
</form>
</div>
<div class="col-12 mt-3 row">
<div class="col-4" v-if="selected.county !== null && selected.town !== null && selected.section !== null">
已經選擇:{{selected.county.name}} {{selected.town.name}} {{selected.section.name}}
</div>
</div>
</div>
</div>
|
 1
 2
 3
 4
 5
 6
 7
 8
 9
10
11
12
13
14
15
16
17
18
19
20
21
22
23
24
25
26
27
28
29
30
31
32
33
34
35
36
37
38
39
40
41
42
43
44
45
46
47
48
49
50
51
52
53
54
55
56
57
58
59
60
61
62
63
64
65
66
67
68
69
70
71
72
73
| // sample.js
const app = Vue.createApp({
data(){
return{
code:{
county: [],
town: [],
section: []
},
selected:{
county: null,
town: null,
section: null
}
}
},
methods:{
getCounties(){
this.selected.county = null;
this.selected.town = null;
this.selected.section = null;
axios({
method: 'get',
url: './api/code'
}).then(res => {
this.code.county = res.data;
Vue.nextTick(() => {
$('#county-select').selectpicker();
})
})
},
getTowns(){
this.selected.town = null;
this.selected.section = null;
axios({
method: 'get',
url: `./api/code/${this.selected.county.id}`
}).then(res => {
this.code.town = res.data;
Vue.nextTick(() => {
$('#town-select').selectpicker();
})
})
},
getSections(){
this.selected.section = null;
axios({
method: 'get',
url: `./api/code/${this.selected.county.id}/${this.selected.town.id}`
}).then(res => {
this.code.section = res.data;
Vue.nextTick(() => {
$('#section-select').selectpicker();
})
})
},
},
watch:{
'selected.county': function (newVal) {
if (newVal === '' || newVal === null) return;
this.getTowns();
},
'selected.town': function (newVal) {
if (newVal === '' || newVal === null) return;
console.log(newVal);
this.getSections();
},
},
mounted(){
this.getCounties();
}
});
app.mount('#app');
|
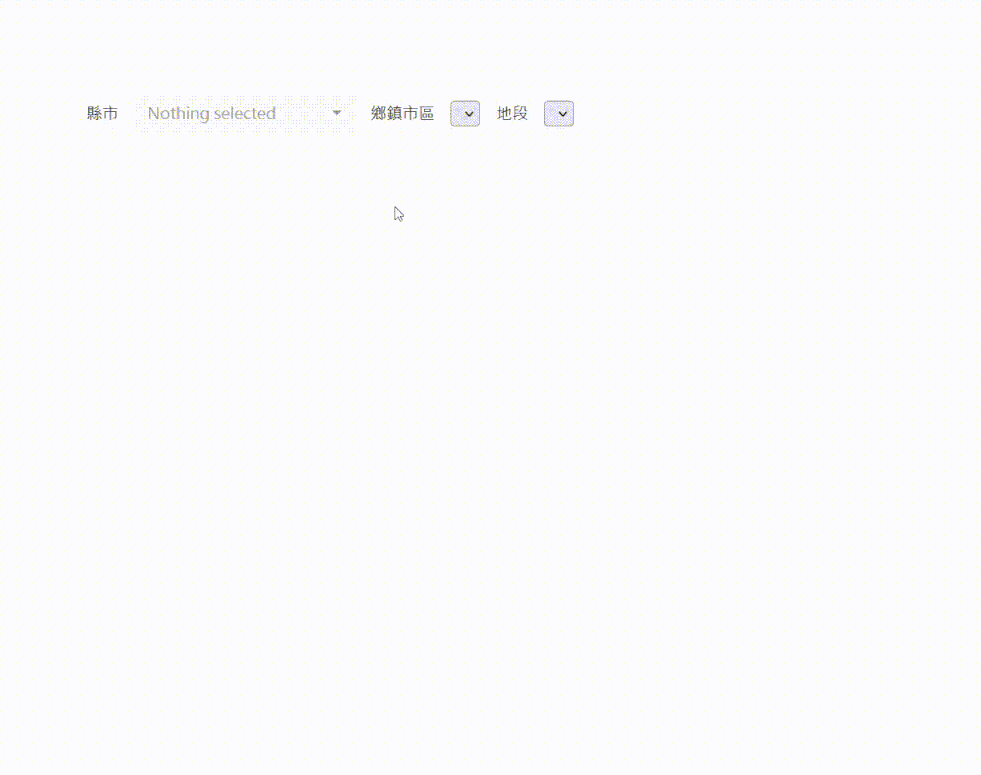
執行之後你應該可以發現兩個問題:還沒有初始化過的選單會長的很醜,和我們預期的樣式不太一樣,以及,我明明資料內容更新了,但為甚麼畫面上仍然是舊的資料呢?我的資料又去哪裡了 😠
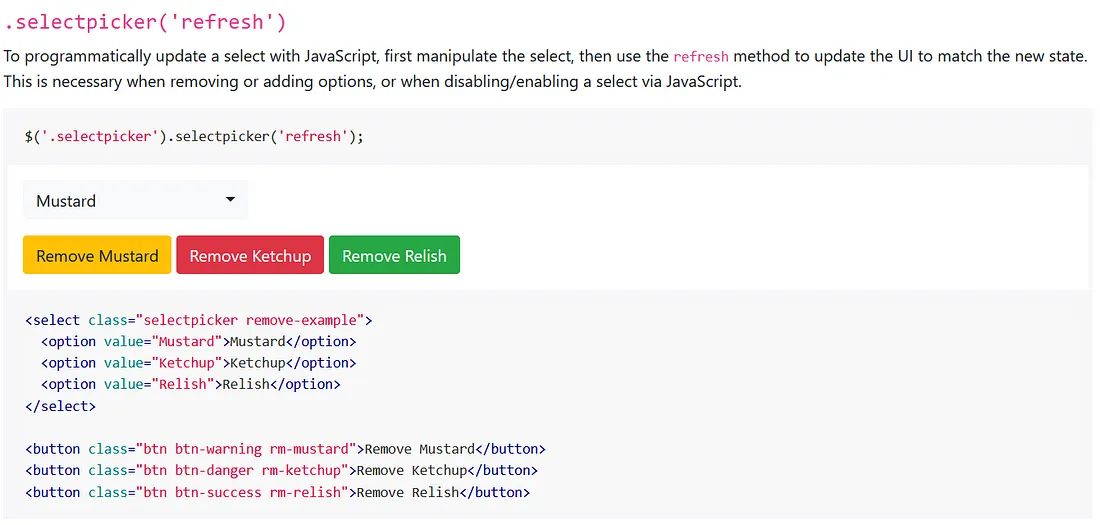
Refresh UI
在官方文件 Methods 的頁面中,可以看到有一個叫做 refresh 的方法,這個方法可以讓我們更新畫面上的 UI 呈現:

既然官方都提供了這個用法,那我們就依照建議修改一下程式碼吧:
 1
 2
 3
 4
 5
 6
 7
 8
 9
10
11
12
13
14
15
16
17
18
19
20
21
22
23
24
25
26
27
28
29
30
31
32
33
| // sample.js
const app = Vue.createApp({
data(){...},
methods:{
getCounties(){
axios({
method: 'get',
url: './api/code'
}).then(res => {
this.code.county = res.data;
// 記得要包在 Vue.nextTick() 中才有效喔
Vue.nextTick(() => {
$('#county-select').selectpicker('refresh'); // 更新 county
$('#town-select').selectpicker('refresh'); // 更新 town
$('#section-select').selectpicker('refresh'); // 更新 section
})
})
},
getTowns(){...},
getSections(){...},
},
watch:{...},
mounted(){
this.getCounties();
// 一次全部初始化
Vue.nextTick(() => {
$('select').selectpicker();
})
}
});
app.mount('#app');
|
資料看起來有被正確的更新到 UI 上了,但為甚麼我的清單看起來還是怪怪的咧 😵
其實,在官方的完整範例中,是先找到要刪除的選項,移除之後才進行 refresh,但不曉得為甚麼,就算按照官方的範例我也無法正常移除 😵
用 Destoy 修正
所以最後我採用的方法,是直接把整個元件 destroy 掉,更新資料的時候再重新建立一個。
 1
 2
 3
 4
 5
 6
 7
 8
 9
10
11
| Vue.nextTick(() => {
// 先銷毀再重建
$('#county-select').selectpicker('destroy');
$('#county-select').selectpicker();
$('#town-select').selectpicker('destroy');
$('#town-select').selectpicker();
$('#section-select').selectpicker('destroy');
$('#section-select').selectpicker();
})
|
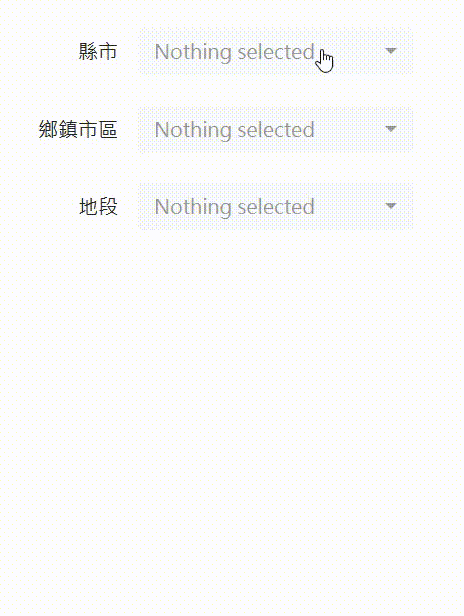
終於可以看到正確的資料有被好好地呈現在 UI 上了 🎊
參考文章